Friday, September 27, 2019

Managing Writers: Interview with Richard Hamilton (podcast)

I recently had a chance to listen to Tom Johnson's podcast entitled Managing Writers: Interview with Richard Hamilton and I found it to be very insightful. I totally agree that documentation metrics are difficult to nail down and pageviews aren't always the best metric (though a decent one).  I personally haven't found a good metric of productivity for tech writers. (If you have one, I'd love to hear about it.)

Documentation managers (writers or otherwise) are best served by simply staying aware of what their tech writers are doing and how heavily loaded they are on a regular basis. Having regular check-ins and one-on-ones is the best way to tell if a writer is overloaded or not.

Saturday, September 14, 2019

Migrating Content From One Confluence Instance to Another

Introduction

From time to time, as a Confluence administrator, you'll be called upon to migrate a space to a new Confluence instance. This guide provides some tried and true steps to generate a list of spaces in Confluence, figure out how active a space is (so you can decide if it should be archived, migrated, or simply removed), how to find a space owner, add a warning message to a space, set a space to "read-only" mode, and delete a space.

Required skills

You should be comfortable and/or knowledgable with the following:
  • HTML
  • Managing Confluence space themes
  • Basic Confluence administration
  • Exporting and importing Confluence spaces

Migrating Confluence content

  1. Generate a list of all the spaces in your old Confluence (instance). This list will be used as a checklist for tracking all the spaces that have been migrated to the new instance.
    1. To get a list of spaces, go to Spaces > Space Directory. This page will show you a list of all the spaces in your instance.
  2. Start reviewing the spaces for level of activity. I believe it is safe to say that if a space hasn't had any visitors in 6+ months, then it should be marked as archived and prioritized for either removal or migration.
    1. To see the level of activity, go into the space and then Space Tools > Activity. In the Activity page, set the Period for months and review the previous six months of activity by clicking on the previous button for the month section.
    2. To archive a space, go to the space in Confluence and then Space Tools > Overview. In the Overview page, click on Edit space details button. From there, change the Status to Archived and click on the Save button.
  3. Identify and speak with space owner(s) and get their permission to archive and/or migrate a space. Also ask them if the space should have a higher or lower priority for migration.
    1. To see who the space owner is, open the space and go to Space Tools > Permissions. Under Individual Users, you should typically see someone who has all permissions to the space. Another way to see who created the space is to go to the space's home page. This home page will have information about who created this page (which should be the person who created the space (i.e. the owner of the space) unless of course the Confluence administrator is responsible with the task of creating spaces.
  4. Work with space owner(s) on active spaces so you don't interrupt their work and set a date for migration.
  5. Add a migration warning to the space that it will be migrated on a designated date.
    1. To add a warning label to a space and the target space is using the Documentation Theme, follow these steps:
      1. Navigate to the space's Themes page (space > Space Admin > Themes).
      2. In the Messages section under Header, add the following code:
        {html}
        <div style="background-color: red; color: white; padding: 5px;">This space will be migrated on <span style="color: yellow"><designated_migration_date></span></div>
        {html}
      3. This will add a message on top of every page in the space and the unstylish colors will definitely grab the attention of everyone viewing the page.
      4. Note: it's a good idea to give everyone at least a two weeks notice about the migration.
  6. For unvisited spaces or spaces about to be migrated, put the space into "read-only" mode.
    1. To make a space "read-only", go to Space Tools > Permissions.
    2. In the Permissions page, you should see a list of space admins and groups. It would be best to leave the permission scheme alone for the space admins but if you have a group where all users fall under, change it so it is only set to All View to checked and everything else is unchecked.
  7. Export spaces on designated dates. Start with higher priority spaces and work your way down to the low priority spaces. See Export and Import a Confluence Space for instructions on how to export a space.
  8. Import the exported space into the new instance. See Export and Import a Confluence Space for details on how to import a space.
  9. Go into the newly imported space and confirm that everything is in proper order (content and attachments are fine, macros are working as expected, permissions are good, and so on). Note: this step may take a bit of time. I recommend that you get help from the original space owner(s) to confirm that the migration went well.
  10. Change migration notice to migrated and marked for removal. Update warning of the exported space in the old instance that it has been migrated (with a link to the new space) and add a removal date.
    1. To add a removal warning, repeat the sub-steps listed in step 5.
      1. Navigate to the space's Themes page (space > Space Admin > Themes).
      2. In the Messages section under Header, add the following code:
        {html}
        <div style="background-color: red; color: white; padding: 5px;">This space has been migrated to <a style="color: white; text-decoration: underline;" href="url_of_new_confluence_instance/display/<spacekey>">url_of_new_confluence_instance/display/<spacekey></a> and will be removed from this wiki on <designated_removal_date></div>
        {html}

      3. This will add a message on top of every page in the space and the unstylish colors will definitely grab the attention of everyone viewing the page.
      4. Note: it's a good idea to give everyone at least a two weeks notice about the removal.
  11. On the designated removal date, delete the space old space in the old instance of Confluence. While this is a very dangerous step, keep in mind that you have the exported zip file and the newly created space in the new instance. If anything goes wrong, you can always re-import the space back into the original Confluence instance.
    • To delete a space, go to Space Tools > Overview. Click the Delete Space button. You may be prompted to enter your credentials so be ready to enter that information. Click the Ok button to start the deletion process. Depending on how big the space is, this could take a few seconds or several minutes. Check with the Time Remaining counter (I find it's mostly accurate 90% of the time but that will vary from server to server based on your server's configuration).
Tip: You may want to include a message at the top of the newly imported space in the new instance where one can find the old space in the old instance. Just use the sub-steps mentioned in either step 5 or 10 and add the necessary info to point back to the old space.

Thursday, August 29, 2019

Should it be Capitalized

Every once in a while I come across fun little tidbits of knowledge. Today, I found this knowledge-nugget which guides one in how to capitalization in a title or headline.


Tuesday, August 27, 2019

Creating Authentic Human Connections Within A Remote Team

I recently read Creating Authentic Human Connections Within A Remote Team posted by Smashing Magazine and I really connected with this article. I have been working as a remote tech writer for three years now and I can say that this experience and what Randy Tolentino wrote is very true. I especially that "Reading emotions across the distance" section was point on. However, I don't agree that using emojis is necessarily a good solution. I think the use of emojis greatly depends on the personality of the person on the other side of the screen. Personally, if I'm having a back and forth with someone on an IM, I just ask if I can video conference with them for 5-10 minutes. That face to face time is much better at connecting to that other person and reinforce that we are humans and not just resources (as Randy mentions in this article).

Wednesday, August 14, 2019

Modifying an Exported Space From Confluence

Introduction

During times of Confluence migrations (from one instance to another), you may find yourself in a situation where the new Confluence instance has a space that has the same spacekey as an old space that you are attempting to import. This month's post will show you how to get around that issue.

Required skills

This document assumes you know how to export a Confluence space already and are comfortable with editing XML files.

Exporting and editing

To start, you will need to expand the exported zip file (that comes from exporting a space). In this expanded directory, you will need to edit the exportDescriptor.properties file. In this file, modify the spaceKey property to the desired spacekey and save your change.

In entities.xml, search and replace the following items listed in this table (replacing NEWKEY with an unused and new spacekey you wish to use in the new Confluence instance):
Search for Replace with
[CDATA[OLDKEY] [CDATA[NEWKEY]
OLDKEY NEWKEY
spaceKey=OLDKEY spaceKey=NEWKEY
[OLDKEY: [NEWKEY:
key=OLDKEY] key=NEWKEY]
<spaceKey>OLDKEY</spaceKey> <spaceKey>NEWKEY</spaceKey>
ri:space-key="OLDKEY" ri:space-key="NEWKEY"
ri:space-key=OLDKEY ri:space-key=NEWKEY
<ac:parameter ac:name="spaces">OLDKEY</ac:parameter> <ac:parameter ac:name="spaces">NEWKEY</ac:parameter>
<ac:parameter ac:name="spaceKey">OLDKEY</ac:parameter> <ac:parameter ac:name="spaceKey">NEWKEY</ac:parameter>
<property name="lowerDestinationSpaceKey"><![CDATA[NEWKEY]]></property> <property name="lowerDestinationSpaceKey"><![CDATA[newkey]]></property>
<property name="lowerKey">![CDATA[NEWKEY]]></property> <property name="lowerKey"><![CDATA[newkey]]></property>
spaceKey=OLDKEY spaceKey=NEWKEY
spacekey=oldkey spacekey=newkey

With those two files updated, re-zip all content back together, rename it to the original zip file (you may need to remove the old zip file or just rename it just in case), and upload it to your new Confluence instance as you would normally to import a space.

Sunday, July 14, 2019

Generate a Path/File Report of HTML Documents

Introduction

While there a bazillions of ways to generate a text file with all the directories and the respective files (Bash comes to mind), I wanted to explore Shell.js for doing this task so it could be chained together in a bigger set of Node.js tools I've been cobbling together recently. I also wanted to make it simpler than recent scripts I've written by foregoing Commander.js and just have it accept one argument which would be the directory to generate the report from.

In theory, I should be able to execute this command and get a text file back with all the files found there and all the nested files and directories: node app.js <directory>

Required skills and npm packages

You should be fairly comfortable with JavaScript and have some exposure to shell.js (0.8.3).

Required modules and variable setup

We'll need to require two modules (shell and fs), grab the user supplied directory (path), and set up a variable to hold the list of items found therein (output).

const shell = require('shelljs');
const fs = require('fs');
const path = process.argv[2];
var output = '';
...

Generate the report

If the path is supplied, then we should inform the user that the script in generating the report, recursively gather all the contents of the target directories, and save out the data to a text file called directorySiteMap.txt.

...
if (path) {
  console.log('Generating directorySiteMap.txt');
  shell.ls('-LR', path).map(function(file) {
    output += file + '\n';
  });

  fs.writeFileSync(directorySiteMap.txt, output);
...

Quit if path isn't supplied

If the path isn't supplied, the script should state as such to the user and gracefully quit.

...
} else {
  console.log('Directory argument is required. Quitting.');

  process.exit(1);
}

Wrapping up

Now we should save this script as directorySiteMap.js and execute it using this command: node directorySiteMap.js <directory>

Friday, June 14, 2019

Write The Docs 2019

The following is a summary of some of the presentations I attended and enjoyed.

Draw the Docs presented by 
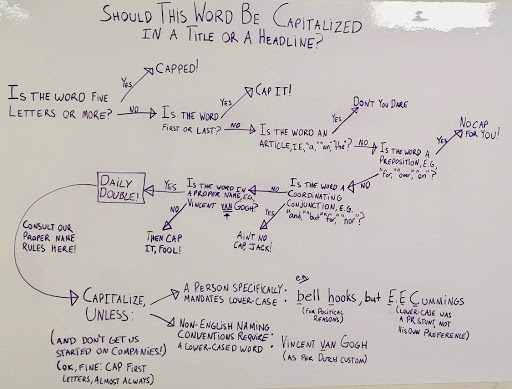
Alicja Raszkowska was interesting as she advocated for using more graphics (particularly cartoons) in technical documentation. While I enjoy the notion of this, one must know their audience before they can start adding cartoons to illustrate their product and/or points. She is also developing a tool called mermaid that creates visual content similar to Visio but with custom images and markdown input.

Sarah Moir's presentation called "Just Add Data: Make it easier to prioritize your documentation" makes a good case for using analytics and other feedback to sort out prioritization of which documents should get the tech writer's attention.

Matt Reiner gave a very energetic presentation called "Show Me the Money: How to Get Your Docs the Love and Support They Deserve" which outlines how to make a business case for getting more resources for documentation. In Matt's presentation, he provides a good and detailed method for creating a business case and how to pitch it to management. I believe this is a good resource for all tech writers!

"How to edit other people's content without pissing them off" by Ingrid Towey was an interesting presentation on editing other people's content. The four principles are as follows: Assure that the content originator that we are all on the same side, when editing content, it's an edit and not an edict, explain why you're editing their content (preferable before you do it), and get help when thinks don't go smoothly. Good idea if one isn't already applying this.

Kathleen Juell's "Writer? Editor? Teacher?" presentation basically provided parallels to how tech writers can leverage teaching philosophy (particular college level) to technical writing. The topics she covered was basic documentation layout, design, and goals, providing templates, peer editing/reviews, and writing like as a teacher or an editor (clarify, explain, and goals). As a former college teacher myself, I see the lines between a teacher and tech write to be very blurry.

Shannon Crabill provided some thoughts and guidelines for how to manage documentation for an open source project in her talk called "Documenting for Open Source". Some tips include avoid assuming the technical knowledge of your readers (one should include a requirements section in your guides as to not lead on the readers who may get frustrated layer in the document when they discover they cannot complete it), README files are required, how to get users started, provide yourself or your team with templates (to avoid issues like duplicate PRs), and always provide links to any and all resources.

Heather Stenson provided some thoughts on how to get non-writers to contribute to documentation in a presentation called "Any friend of the docs is a friend of mine: Cultivating a community of documentation advocates". She defined who "friends of docs" are (those who write but are not technical writers), the different levels of friends of docs, how to get people to contribute more, strategies to find, support, communicate, and provide feedback to these friends, how to overcome obstacles friends of docs may encounter, and how to continue building this doc-friendly culture.

Chris Bush gave a dry-humor filled presentation called "SDK Reference Manuals: A flow-based approach". Overall it was dry but reassured that the process for creating, maintaining, and updating SDK docs haven't really changed all that much in years.

This conference also live-streamed and posted all their presenters on this YouTube playlist: https://www.youtube.com/playlist?list=PLZAeFn6dfHpmuHCu5qsIkmp9H5jFD-xq-